TAXI: CONTROL THE GEOMETRY AND WORKLOAD
Our first journey is across Frankfurt's taxiways, and it deserves the same attention as the route to London. Find the aircraft on the airport chart and trace the cleared taxi route to the next holding point. Notice each turn and any runway crossing before releasing the brakes. A taxi clearance gives us a route with a limit; a runway crossing or entry needs the appropriate clearance too. If a revised instruction leaves the picture unclear, stop somewhere suitable and sort it out. Frankfurt offers plenty of taxiways; choosing one by guesswork can produce an unplanned airport tour. [13, PDF pp. 107-116]
Begin slowly enough to check that steering and braking behave as expected. The tiller is the hand control with the larger nosewheel-steering range for ground manoeuvring. Pedal steering offers a more limited range for directional control. Your simulator hardware may combine or separate these inputs according to its configuration, so check what the cockpit control and aircraft actually do. A pedal that feels centred on the desk is useful only if the aircraft receives the intended input. Make the brake check at low speed and establish that the aircraft slows predictably before approaching a tight turn or nearby traffic. [13, PDF pp. 108-110]
Keep looking outside as the aircraft gathers momentum. Use the thrust needed for the conditions, allow for the time it takes to slow, and prepare for turns early. The nose is only one part of the aircraft: the main wheels follow their own path, while the engines, wings and tail need clearance as well. This is particularly noticeable in the longer A321. Move your view when necessary so that an attractive cockpit panel does not hide the object we are taxiing towards. A calm ground pace leaves room to observe those relationships and arrive at the holding point with the preparation still under control. [13, PDF pp. 107-116]
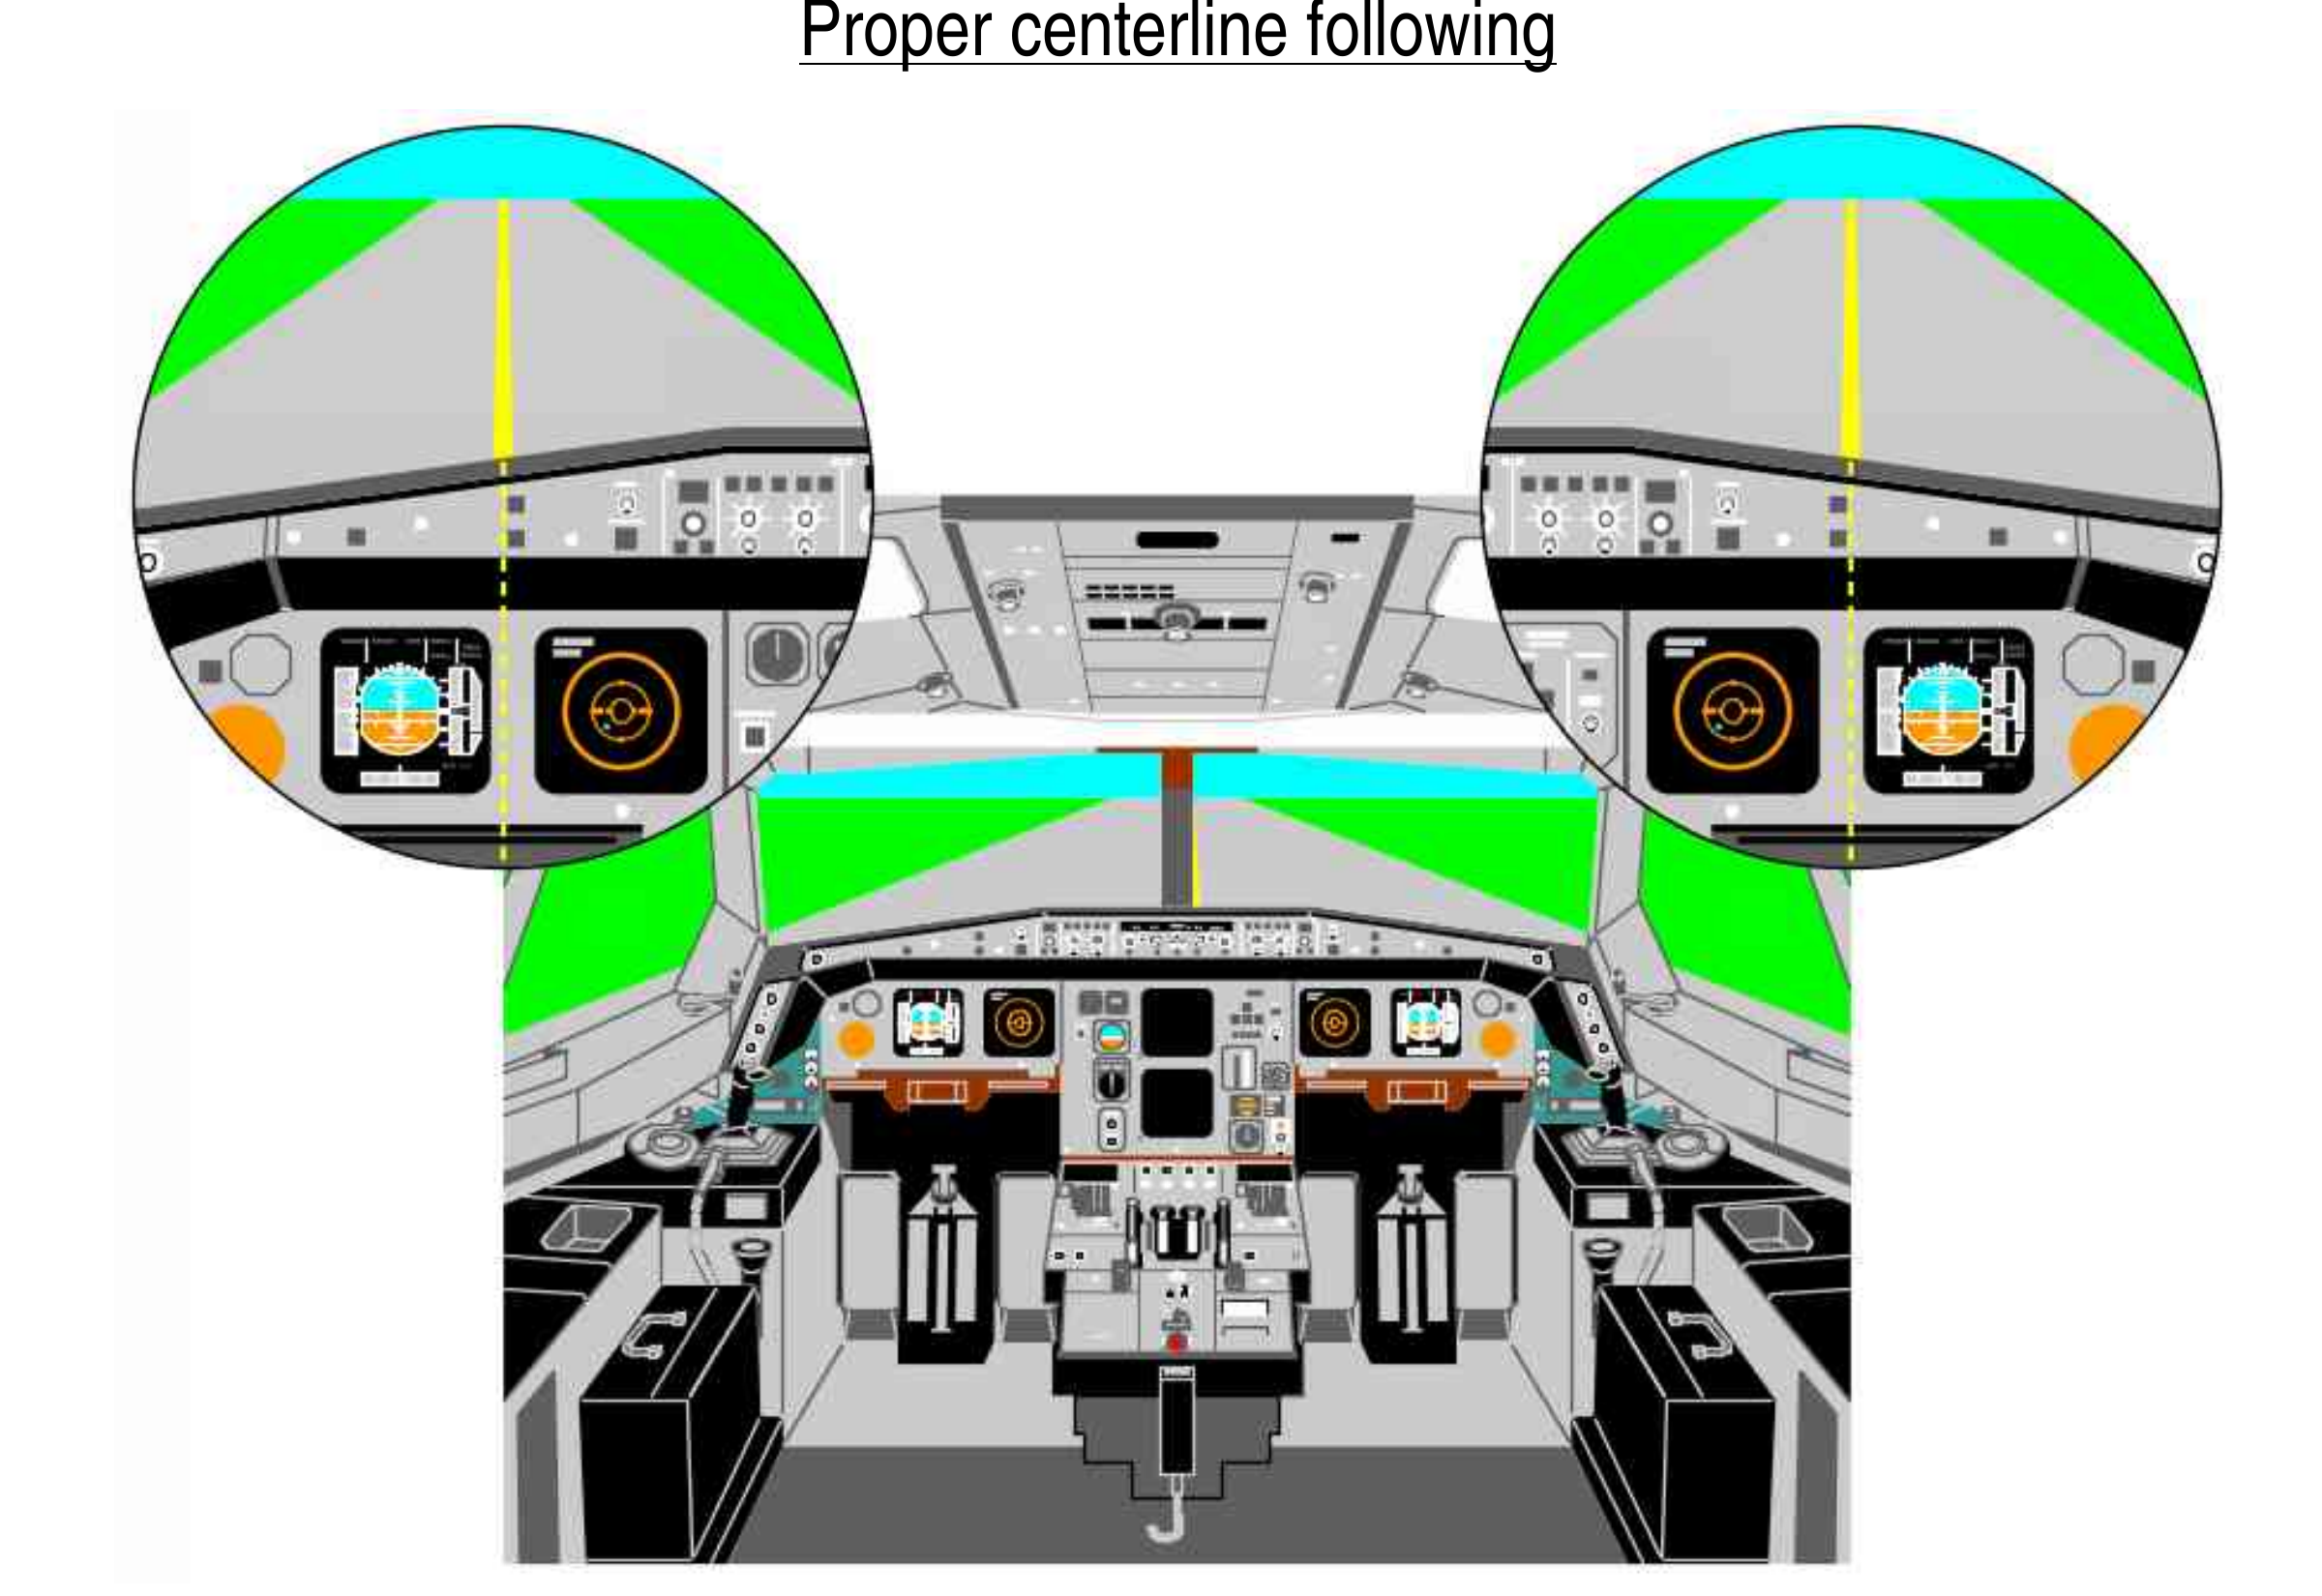
Original Airbus cockpit sightlines for centreline following. The illustration explains eye-position geometry; equipment details belong to the source. [13, PDF p. 109]
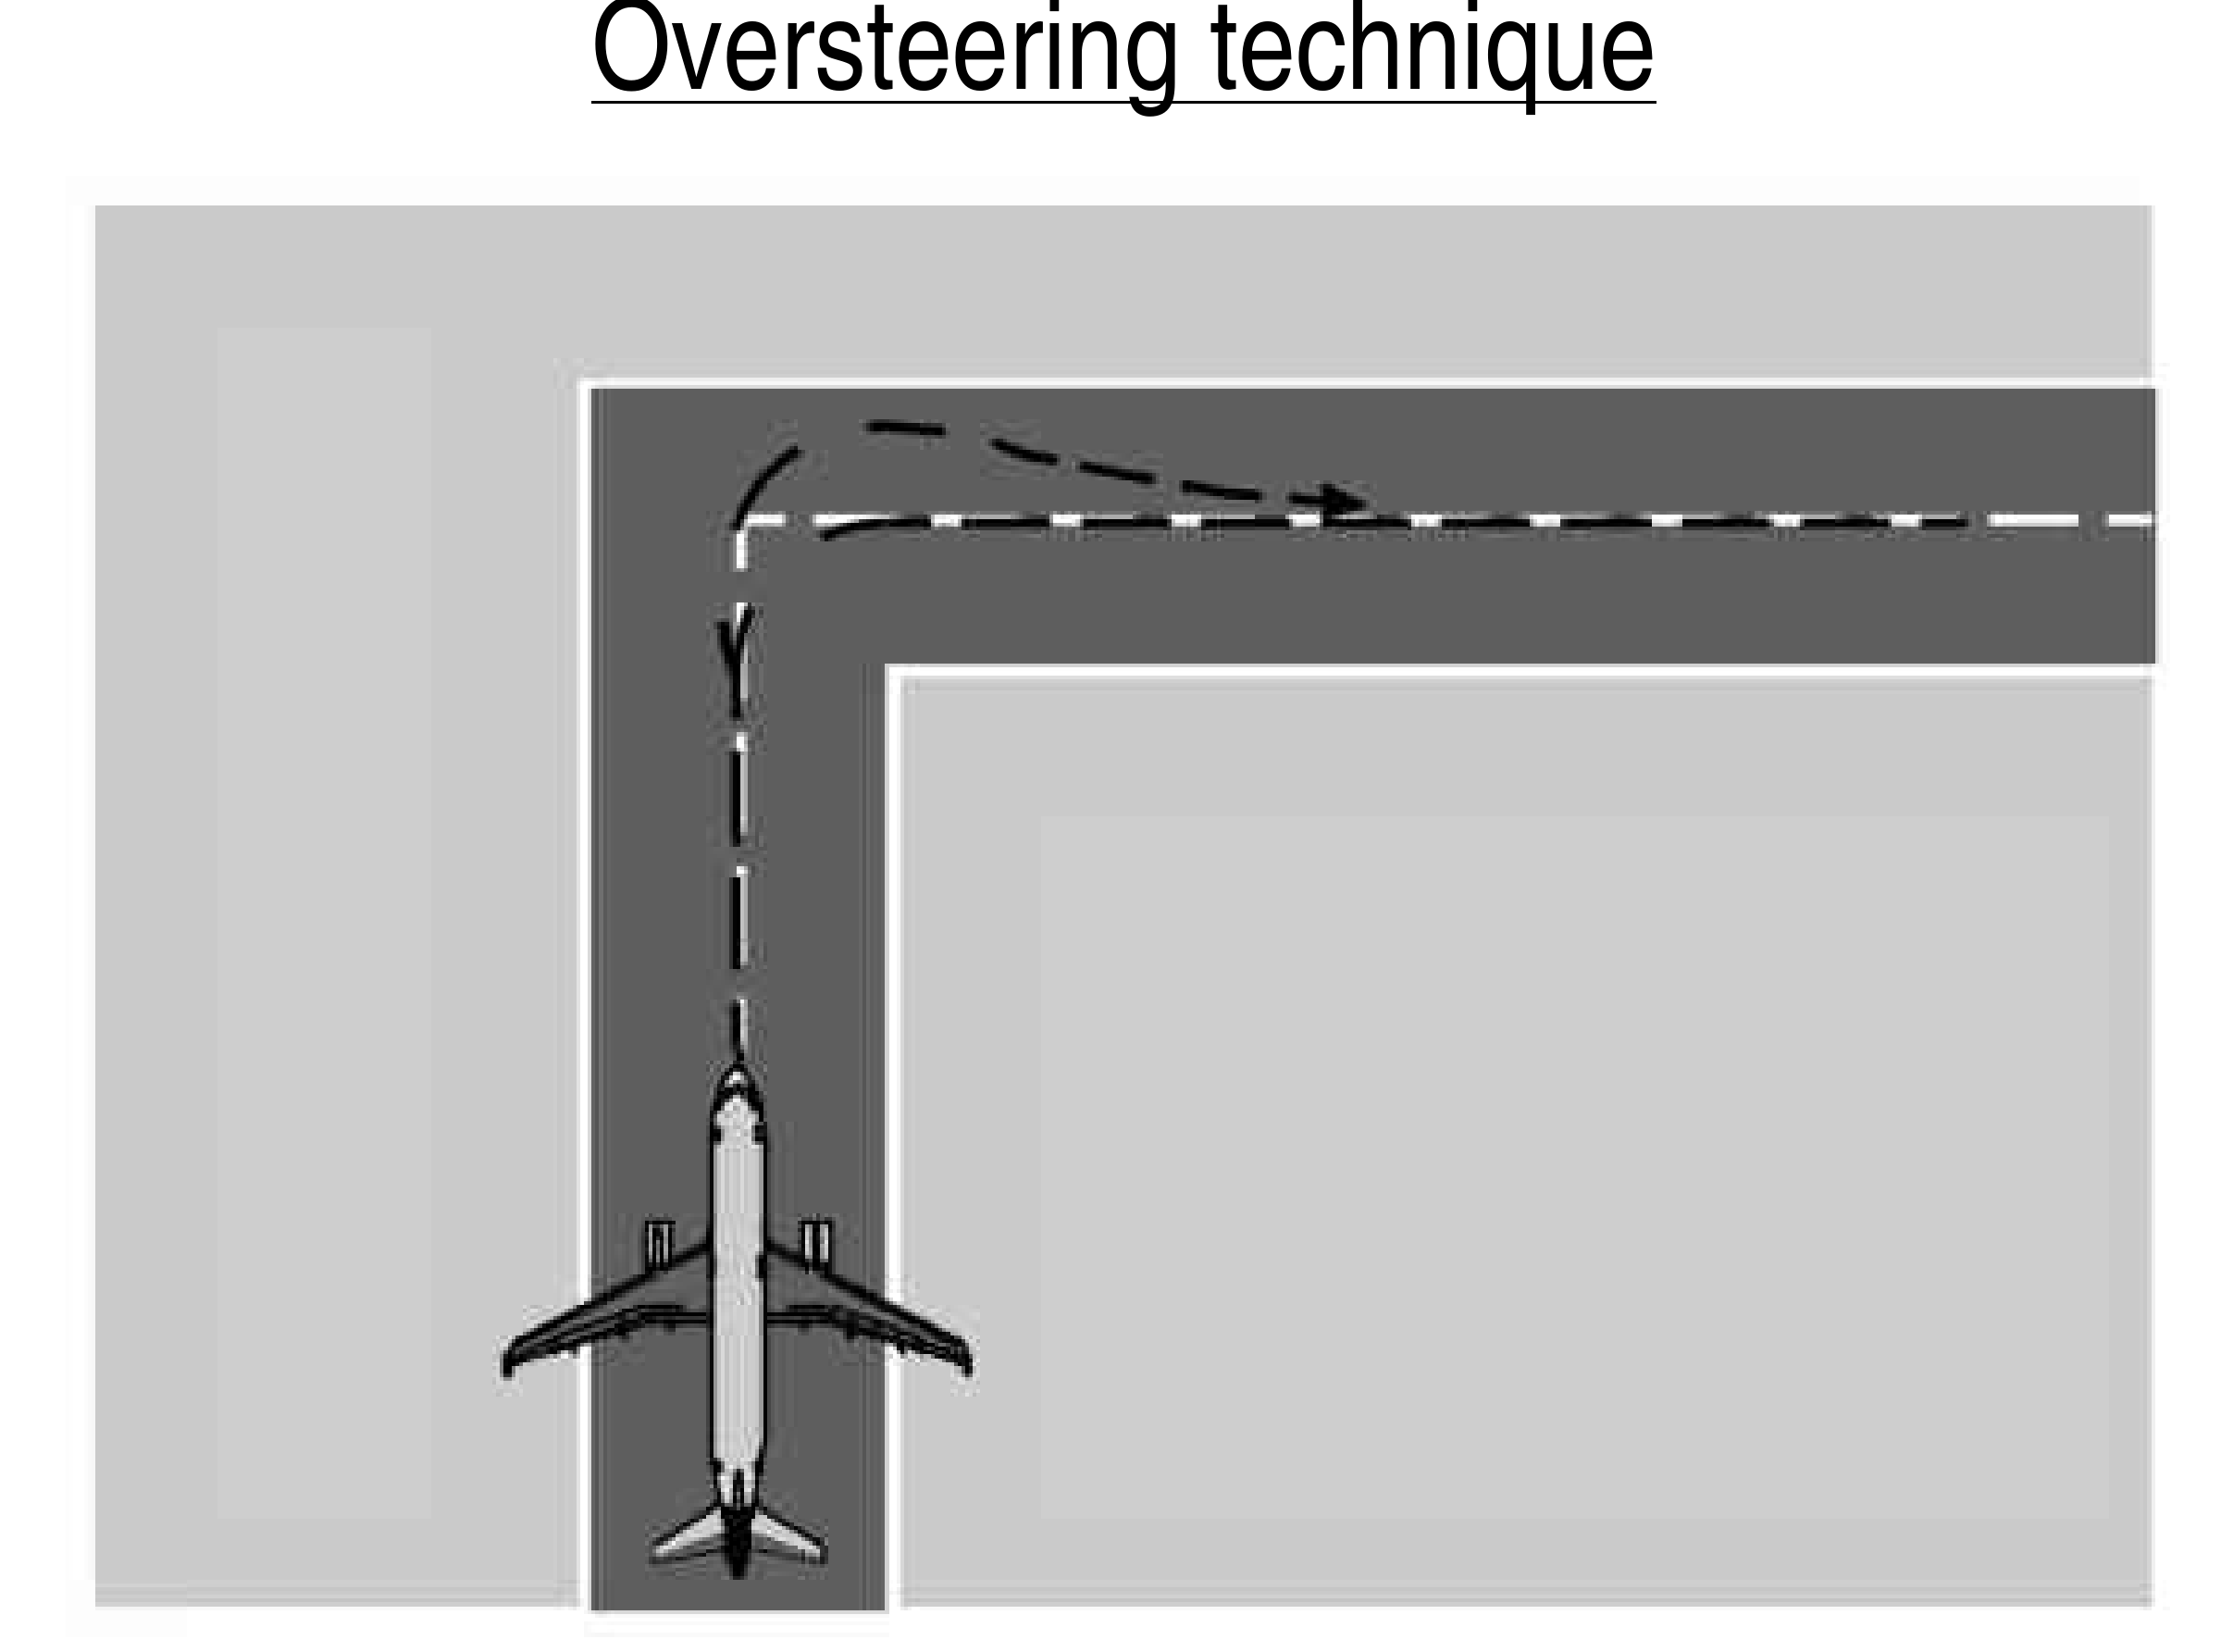
Original Airbus oversteering illustration: main gear follows inside the nose path. [13, PDF p. 110]
IN PRACTICE: Taxi to the holding point with the aircraft in view
Before you begin: The After Start checklist is complete, the tug is clear, steering is available and the taxi clearance has been understood.
1. Make the clearance into a route
Action. Locate the cleared taxiways, runway holding point and any crossing clearance on the current airport chart. Identify the first turn before releasing the brake.
Check. The clearance has a visible path on the airport, including a definite place to stop. [14, PDF pp. 1051-1062] [13, PDF pp. 107-116]
2. Start moving with a small, symmetrical thrust input
Action. Release the parking brake and use only the thrust needed to establish movement. As the aircraft rolls, reduce towards idle and check that the foot brakes provide the expected response.
Check. The aircraft moves controllably, both engines respond sensibly and normal braking is available before speed builds. [13, PDF pp. 108-110] [13, PDF pp. 112-113] [14, PDF pp. 1051-1062]
3. Steer with the right control
Action. Use small pedal inputs for straight tracking and shallow corrections; use the tiller for sharper low-speed turns. Make an input, hold it long enough to see the response, and then make the next correction.
Check. The nosewheel follows a smooth path instead of a series of abrupt reversals. The aircraft stays on the intended taxi route. [13, PDF pp. 108-110]
4. Give the main gear room
Action. Look through the turn and account for the main gear cutting inside the nosewheel path. Anticipate the steer-out; on the longer A321, give the different wheelbase and fuselage their own attention.
Check. Both main gear and the airframe remain within the available pavement and clearance. A nosewheel on a line has not been used as the sole clearance check. [13, PDF pp. 108-110] [14, PDF pp. 1051-1062]
5. Manage speed without riding the brakes
Action. Use the ND groundspeed and outside picture together. When braking is needed, make a controlled application and release it once the desired speed is reached; check brake temperatures during the taxi.
Check. Speed suits the turn, traffic and visibility. Repeated small brake applications are not quietly building unnecessary heat. [13, PDF pp. 112-113]
6. Stop with the clearance still in force
Action. Approach the assigned holding point at a controllable speed, identify its marking and sign, and stop before it unless the clearance explicitly permits entering or crossing.
Check. The aircraft is at the correct holding point with the runway boundary respected and the Before Takeoff work ready to finish. [14, PDF pp. 1051-1062] [14, PDF pp. 1063-1064]
Complete when: At the holding point, the aircraft is under control, the brakes and steering have been checked, and the actual runway entry is positively identified.